
|
|
|
|
PROGRESS REPORTS FOR DECEMBER 2002
This page is currently under construction. Please come back soon to see the latest updated version. I will be adding more photographs very shortly.
Torso
This month, I have been busily engaged in improving my robot's Dewey Howard torso. The relevant projects have been the following:
1. Creation of concave circular flanges for the torso microphone and torso knob.
My Dewey Howard torso had flat raised discs instead of the correct concave
flanges.
The correct flanges look like this:
 |
 |
After considering various options for creating the flanges, I decided that the easiest way would be to cut a large hole in the existing disc and have the resulting ring serve as the outer ring. I would then glue a stainless steel washer behind the ring and sculpt the slight beveling with plumbers epoxy.

I decided that the hole should be cut out with a one-inch hole saw. It took only a few minutes to accomplish this. It looked great! Unfortunately, after I made the cut, I realized that my calculations were wrong. The ring was too fat. I should have used a one-and-one-fourth inch hole saw. I rushed out and bought the correct size Vermont American Carbon Hole Saw (model 18301), but realized that it was impossible to use it. To try to rectify my mistake, I instead took a pencil and traced the correct size one-and-one-fourth inch hole. Next, I used a Dremel tool to sand the excess material away to enlarge the hole. The results are imperfect, but one would have to look very close to see that the inner circumference of the ring is not a perfect circle. The outer circumference of the ring is indeed a perfect circle. The eye will focus on this and be fooled into thinking that they ring is perfectly formed.

My Dewey Howard fiberglass torso was professionally cast and is extremely thick. Indeed, the fiberglass was almost a half an inch thick behind the flanges! In order to space the washer correctly behind the ring, I had to sand away quite a bit of fiberglass. Thankfully, the Dremel tool made this a very easy job.
Unfortunately, I got carried away on the fiberglass behind the torso knob ring. I sanded right through the torso above the ring! Instead of panicking and tossing the torso in the rubbish bin, I took comfort from the experiences of other robot builders and realized that repairing such a deficit would be very easy with Bondo.
Never having used Bondo before, I was a bit apprehensive about using this material, but it turned out to be very easy. In fact, I loved using Bondo so much, that it slathered it liberally on other parts of the torso that needed a bit of improvement and repair.
After the Bondo dried, I gently sanded the excess away. The result was wonderful! Once the torso is painted, no one will ever be able to detect the damage.

Next, I will epoxy the washers to the back of the rings and use some
plumbers epoxy to sculpt the beveled area.
2. Rounding the torso bands around the mouth opening
My Dewey Howard torso has fairly straight angles where the vertical mouth bands meet the horizontal band below the mouth.

In the original robot, this angle is not 90 degrees. It is nicely rounded:

It was very easy to round these corners using a file. The only problem was that the file removed a bit of material from the vertical bands the extend below the vertical mouth bands. This deficit was easily repaired using my new friend Bondo brand body filler.

3. Wrist latch peg holes
The metal pegs on to which the wrist latches hook require that holes be drilled into the roof and floor of the arm bays. This was tricky to do because the arm bays are not large enough to fit a standard size drill. I had to drill the holes at an angle. I then straightened out the resulting hole using a rat tail file.
The pegs will be made from a rod of stainless steel that I purchased at Orchard Supply Hardware. Once I cut the rod into appropriate lengths, I will glue the rods into wooden blocks. This blocks will be mounted inside the torso behind the visible holes in the arm bays. The rods will protrude and can be sanded by hand to have the correct rounded ends.
The advantage of gluing the pegs to wooden blocks rather than directly to the torso is that they can be removed and replaced easily without damaging the torso.
Unfortunately, the drill that I used to drill out the holes chipped some of the gel coat around the edges of the hole. This has been repaired with Bondo body filler. What would a robot builder do without Bondo?

The original hole is very hard to see in this photo, it is the faint
Bondo pink circle at the bottom of this arm bay. My next task is to redrill
the hole.
4. Upper horizontal torso band
My Dewey Howard torso was flawed by having an upper torso band of the
wrong dimension. Instead of a flat top, the top aspect of the band sloped
up toward the torso.

Note the difference between this angle and that of the original robot:

I was told by "experts" in fiber glassing that it would be impossible to sand the upper torso band down to the correct angle. "You will sand right through the gel coat and expose the fiberglass!" they warned. "You will never get the angle right. Only a machine can keep the angle straight!"
Ignoring these "experts," I sanded away one afternoon this month using 100 grit sandpaper wrapped around a long block of wood. The result was perfect.

The Dewey Howard fiberglass torso was so well made, that the gel coat is just as thick as the underlying fiberglass. I sanded away a large amount of material and only once got below the level of the gel coat. In these few areas, the torso became transparent where the fiberglass was exposed. Rather than continuing my sanding, I thought it best to reinforce the torso from behind with fiberglass.
On 23 December, I fiberglassed the torso. This was a horribly difficult and frustrating job. I used Bondo brand polyester resin as well as Bondo brand fiberglass cloth (No. 499). I cut the cloth to the right width with scissors. It was very easy to mix the resin with the hardener. It was very easy to cut the cloth sheet into appropriately sized strips. The instructions on the can of resin were very easy to follow. It was very hard, however, to work within the torso. There is insufficient room to get one's arms inside the torso, either from the bottom or the top. Nonetheless, after an hour or so of cursing and foot stomping, I managed to lay down two layers of fiberglass.
Once the new fiberglass has set, I will continue sanding away the upper torso band to achieve the desired 90 degree angle. If I find that the upper band looks a little rough, I will fill it in with Bondo body filler. I could fill it in with Bondo brand gel coat, but gel coat seems rather difficult to use, judging by the articles I have read on the internet. Since the torso will be painted, regular Bondo body filler will be just as good.
Normally, it should take about two hours for the resin to cure. I want to take this job slowly, so waited until the next day to lay down the some more layers of fiberglass. My goal is to create a thick ring of fiberglass behind the torso band so that my sanding and resculpting of the upper torso ring will not impair the strength of the torso. After all, it has to support the weight of the head and my aluminum radar!
5. Filling in hairline cracks
Being unable to curb my enthusiasm for attainable perfection, I was delighted the other day to discover that Bondo makes an excellent product that is ideal for filling in hairline cracks -- Bondo Glazing & Spot Putty (No. 907). This is fortunate because I had noticed a few tiny hairline cracks in the gel coat of my torso, especially in the torso bands that form the borders of the four torso vents. One simply squeezes out a dap of this malodorous red paste onto the offending crack and rubs it about with a rubber spackling paddle. Once it dries, one can simply sand away the excess. The instructions on the tube of glazing putty indicate that more than one application is necessary to fill cracks. I have found this to be true. I have given each crack two applications now, sanding away all access in between coats.

6. Future torso-related projects
a) Redrill wrist latch pegs. As mentioned above, there was some chipping
around the holes that I drilled out for the pegs in the arm bays.
b) Figure out a way to attach sockets for the power pack plugs. The power pack has three RCA plugs. At present, my torso has three small holes drilled into it to receive the plugs. This arrangement is imperfect, as the plugs must eventually be inserted into sockets that can be wired. I think I may have to go out and buy the sockets from Radio Shack, enlarge the holes in the torso to fit the sockets, and then epoxy them in place.
c) Create lip for the neck of the torso. In the original robot, there
was a slightly raised lip around the opening to the top of the torso;

Here is a screengrab in which one can see the lip in the original robot. |

The lip is easier to see in this photograph of Craig Reinbrecht's robot. |
I decided that the easiest way to create the lip would be to use some aluminum angle. I bought a length of angle and will have my machinist bend it in a circle of the correct diamter on his rolling machine. I believe that Craig Reinbrecht made his lip out of fiberglass. This seems a bit beyond my ability. My rolled aluminum angle will be just as good and a lot less messy. It will be attached to the toros with the same screws (visible in the photograph above) that secure the latches.
d) Creation of little rubber gasket below each torso hook. Notice the
nice gasket in the photos below:
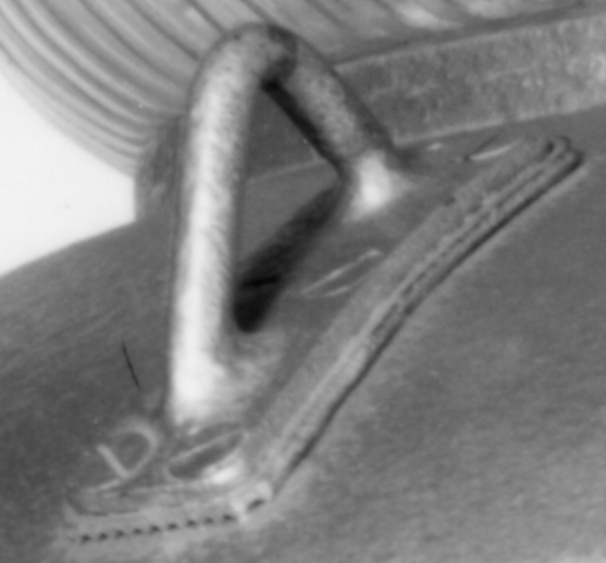
Notice that the ridged surface of the rubber gasket is placed against
the torso. I think that I will use a flexible and rubbery plastic material
for durability and longevity. This gasket will then be painted along with
the torso and torso hooks at the auto body paint shop.
The object of all this work is to give the torso a perfect surface for painting. I want all holes to be drilled in the torso before it is painted. Once I have brought the torso up to a level of acceptability, it will be ready to send to an auto paint shop. I expect to reach this stage of my building project by the beginning of January 2003.